
As an Amazon Associate I earn from qualifying purchases. Learn More
Achieving salon-worthy hair at home can be a challenge. A Rusk flat iron could be your ally.
Imagine stepping out each day with hair that looks like you’ve just visited a pro stylist. That’s the promise of using a Rusk flat iron, a tool favored by hair care enthusiasts and professionals alike. This tool is designed to offer sleek, smooth, and shiny results, but using it correctly is key to unlocking its full potential.
Our hair speaks volumes about our style and confidence, and the right technique can elevate your look from ordinary to outstanding. Whether you have unruly curls or lifeless straight locks, the Rusk flat iron can help you transform them. This guide will walk you through each step, ensuring you know how to glide, section, and style your hair for that enviable, professional-level finish. Let’s turn that daily hair battle into a seamless routine, leaving you with more time to enjoy flawless hair every day.

Choosing The Right Rusk Flat Iron
Achieve salon-quality hair at home with the right Rusk Flat Iron. Discover tips for sleek, smooth results every time with this styling tool.
Choosing the right Rusk flat iron is key to achieving salon-quality hair at home. Different features and specifications make each model unique. Knowing which one to pick can transform your hair styling routine. Let’s dive into how to select the best Rusk flat iron for your needs.
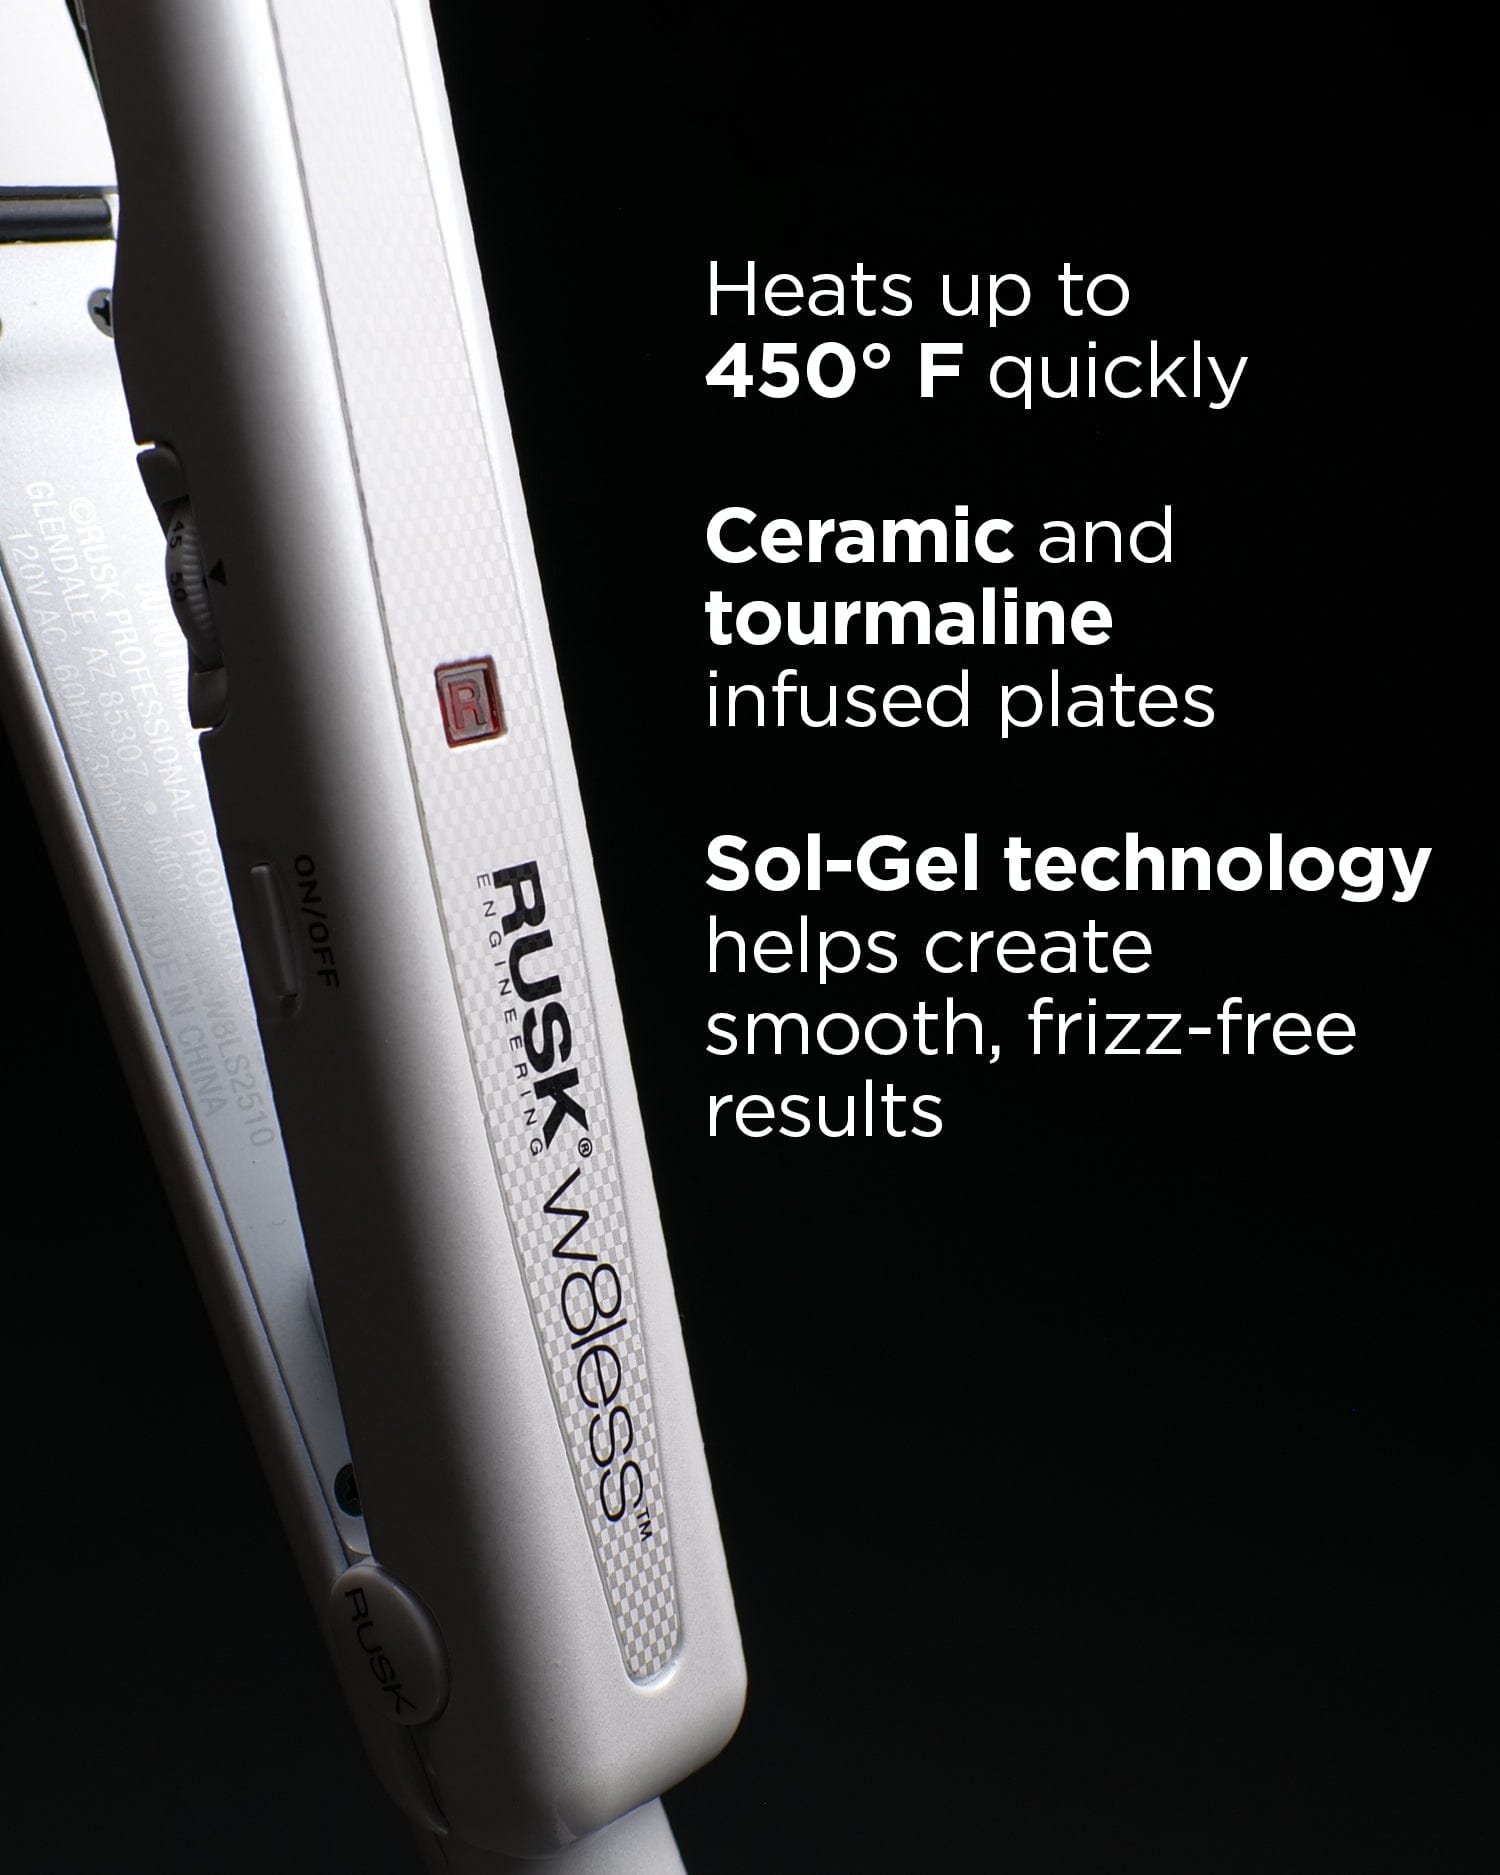
Consider The Plate Material
The plate material of a flat iron affects its performance. Ceramic plates distribute heat evenly, preventing hot spots. They are gentle on hair, reducing damage. Titanium plates heat up quickly, offering faster styling for thick or coarse hair. Tourmaline plates emit negative ions, boosting shine and reducing frizz. Choose based on your hair type and styling needs.
Selecting The Appropriate Size
Size matters in flat irons. A wide plate, around one and a half to two inches, suits long, thick hair. It covers more area, speeding up the styling process. A narrow plate, about one inch, works well for short hair or fine hair. It offers precision styling, ideal for bangs and finishing touches. Consider your hair length and type when picking the size.
Temperature Settings For Different Hair Types
Different hair types require different heat settings. Fine or damaged hair benefits from lower temperatures, around 300°F. It prevents further damage. Normal hair can handle medium heat, approximately 350°F to 375°F. Thick, coarse hair needs higher temperatures, up to 450°F, for effective styling. Adjustable temperature controls allow you to find the perfect setting for your hair type, ensuring safety and optimal results.
Preparation For Perfect Styling
Getting sleek, professional-level hair at home starts with the right preparation. Before using a Rusk Flat Iron, ensure each step is done right. This will protect your hair and give you the best results.
Cleaning Your Hair
Start with clean, dry hair. Use a gentle shampoo and conditioner. Make sure your hair is free from oils and build-up. Dry hair completely before styling.
Applying Heat Protectant
Never skip the heat protectant. It shields your hair from damage. Spray evenly over dry hair. Comb through for even distribution.
Sectioning Your Hair
Clip your hair into sections. Work with small parts for even heat application. Use hair clips to hold each section. This makes styling with your Rusk Flat Iron easier and more efficient.
Mastering The Technique
Mastering the Technique of styling with a Rusk Flat Iron takes practice. This tool can create sleek straight hair or bouncy curls. Follow these steps for salon-level hair at home.
Holding The Flat Iron Correctly
Holding your flat iron right is key. A firm, comfortable grip ensures control.
- Thumb on one side.
- Fingers on the other.
- Don’t squeeze too hard.
Glide And Slide: The Ideal Movement
The right move makes all the difference. Smooth, even pressure from roots to ends works best.
- Start near the scalp, but not too close.
- Clamp hair lightly.
- Glide down slowly, evenly.
Achieving Curls And Waves With A Flat Iron
Flat irons aren’t just for straightening. They curl and wave too.
| For Curls | For Waves |
|---|---|
| Twist the iron away from your face. | Make a ‘S’ shape with your hair. |
| Pull through to the ends. | Press lightly with the iron. |
Maintaining Your Rusk Flat Iron
A well-maintained Rusk Flat Iron can give you salon-quality hair at home. Let’s learn how to keep it working perfectly. Follow these simple steps.
Regular Cleaning For Longevity
Clean your flat iron to make it last longer. Turn it off and cool it down first. Use a soft, damp cloth to wipe the plates. Do this after every use. Avoid harsh chemicals.
Storing Your Flat Iron Safely
- Wait for the iron to cool down.
- Wrap the cord loosely to prevent damage.
- Store it in a dry place, away from water.
When To Replace Your Flat Iron
Know when it’s time for a new iron. Look for these signs:
| Sign | Action |
|---|---|
| Plate Damage | Replace the iron. |
| Heating Issues | Time for a new one. |
| Electric Problems | Get a new iron. |

Conclusion
Achieving salon-worthy hair at home just got easier with a Rusk flat iron. Master sleek styles and curly looks with the right techniques. Remember, practice makes perfect. Keep heat settings in mind for hair health. Use heat protectant always. Embrace the confidence that comes with great hair days.
Ready to step up your styling game? Grab your Rusk flat iron and get styling! Your professional-level results await.