As an Amazon Associate I earn from qualifying purchases. Learn More
Curling irons often come in two kinds; the ones with built-in clamps and those without clamps. If you have the iron with clamp and are stumped on how to use it, don’t worry; we have you covered.
In this article, you will find everything you need to know about curling irons, including step-by-step explanations on how to use those with clamps and our favorite curling irons.
Let’s get started.
Step By Step Guide On How To Use A Curling Iron With Clamp
Although your curling iron may look a little intimidating, it makes styling a breeze and is very easy to use. Let’s walk you through safe ways to use these curlers with in-built clamps.
Step 1: Prep Your Hair
Prepping your hair is the first and perhaps the most important step. It determines the quality of results you will enjoy after your curling session. Here’s how you should prep your hair.
- Wash it thoroughly with a volumizing shampoo (check to make sure it is sulfate-free).
- Condition your hair to lock in some moisture; you don’t want your hair breaking.
- Use a blow dryer to dry your hair till it is 80% dry. If you don’t have a blow dryer, you can air-dry your hair. It is just going to take longer.
- Once your hair is dry, slather your favorite heat protectant all over your strands.
Step 2: Turn on Your Curling Iron
Switch on your curler and allow it to warm up. This step is important because it will enable you to get evenly curled hair.
Related: How to Use a Curling Iron for Perfect Curls
Step 3: Section Your Hair
While you wait for the curling iron to warm up, divide your hair into 3-4 even sections. If you have thick hair, you may have to divide it up into 5 sections. Ensure that the sections are manageable. Also, if you want to wear your hair in a part (center or side part), now is the time to create it.
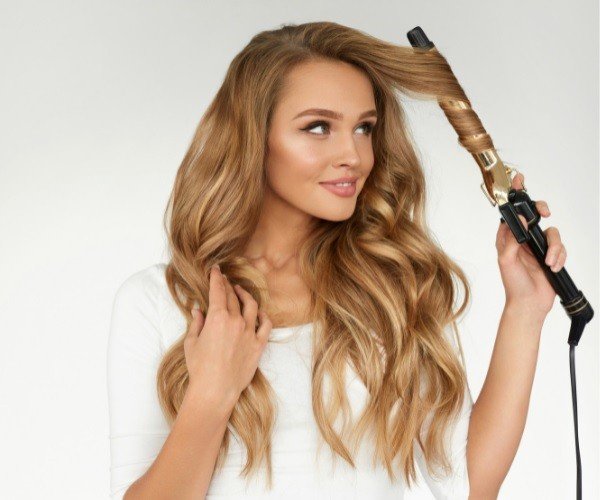
Step 4: Begin Curling Your Hair
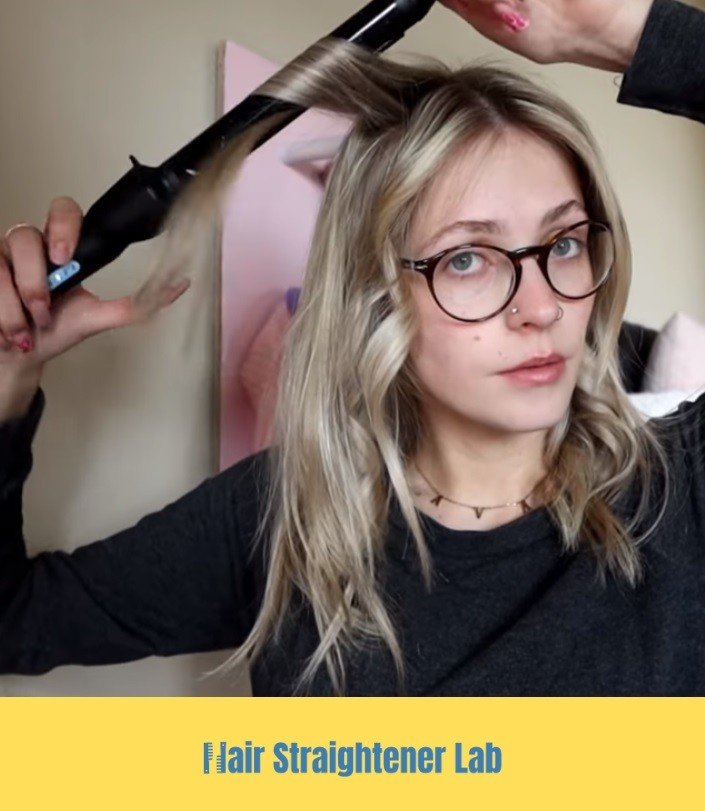
Check that your curling iron is hot enough and begin curling your strands using the twist and hold method. Wrap a small portion of your hair around the barrel of the curler and clip the strands at your roots.
Remember, wrap from the tip to your roots before clamping. That way, you can avoid the ugly clamp marks. Clamp down for a few seconds, then release the clip and gently release your curls. Repeat this step until you have covered all the sections of your hair.
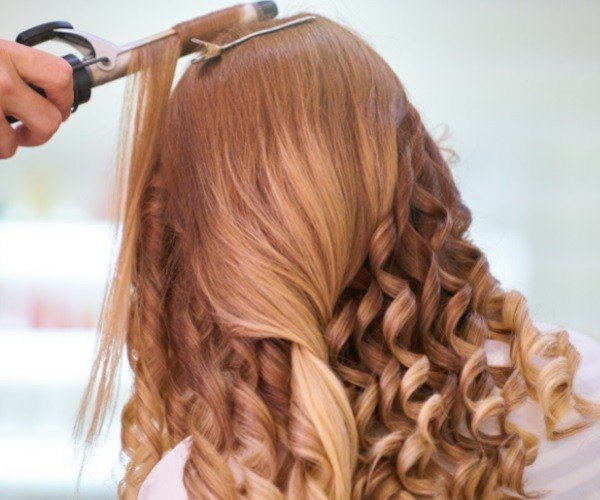
Step 5: Style Your Hair
You can give your curls a shake to give them a little more bounce. Alternatively, you can use a brush to arrange the curls as you like. Once you’ve styled your hair, spritz some setting spray on it to hold it in place.
What Are The Pros And Cons Of Buying A Curling Iron With Clamp?
If we had a dollar for each time we were asked this question, we’d be sitting in a pool of money! We understand that most times, the decision of whether to buy a particular styling tool comes down to its pros and cons.
So, let’s look at some pros and cons of curling irons with a clamp.
Pros
Easy Styling
Curling irons with clamps simplify the whole styling process and save you a lot of time. With them, you don’t need hair clips to hold your hair in place. The clamp takes care of that.
Curl Definition
If you’ve been looking for how to create your favorite curls, this tool right here is the answer. With just a slight change in how you hold the curler, you can create loose, bouncy, or well-defined curls. Nothing is stopping you!
Related: How to Clean a Curling Iron
Ease of Use
The curling iron with clamp is super easy to use once you learn how. All you need to do is wrap your tresses around the barrel, clamp down near your roots and wait for the curls to set. Yup, that’s pretty much it!
Cons
Here are some drawbacks of the curling iron with a clamp.
Lack of Portability
The built-in clamp makes the tool bulkier and can be difficult to pack up and lug around. Except you have extra luggage space.
Misshapen Curls
If you hold this curler at the wrong angle, you can wind up with misshapen curls. That is why we suggest you refine your technique with the curler turned off.
How To Avoid Crimped Curls
If you dread ending up with crimped curls, we have good news for you. The trick is to hold your curling iron with a clamp at the right angle. Here are ways we found to avoid this look.
- Hold your curling iron at a slight angle while wrapping your hair around it.
- If your hair is long, ensure that you wrap your strands properly around the barrel and clamp down very close to the root of your hair.
Tips On How To Achieve Different Looks With Your Curling Iron
Here are some tips to help you achieve the curls of your dreams.
- If you want bouncy curls, then hold the curling iron horizontally.
- Hold it vertically for loose beach waves.
- If you want defined, tight locks, then use a curler with a clamp and a small barrel. The smaller the barrel, the better the definition of your curls.
- Twist the curling iron to your roots for added volume.
- For a more natural look, rake your fingers gently through the curls.
- Spritz a generous amount of your favorite hairspray or hair mousse to set the curls.
Bonus: Top Curling Irons With Clamps
Here are four of our favorite curling irons with clamps.
- Hot Tools Signature Series Gold Curling Iron/Wand
- 5 in 1 Curling Iron Wand Set
- T3 – Twirl Trio Interchangeable Curling Iron
- K&K Curling Iron 1.25 inch with clamp Hair Curler
Conclusion
You can up your style game by getting a curling iron with a clamp. It is super easy to use and helps you create different curl types. Our step-by-step guide on how to use this type of curler is perfect for beginners.