As an Amazon Associate I earn from qualifying purchases. Learn More
In the beauty world, many fashion trends have been resurrecting recently. And hairstyle is not left out of this return.
Remember that voluminous and classic hairstyle in the 90s?
Well, it is back to the hair trend now. And it is now known as the 90’s blowout. Many people feel intimidated by this style because they think it is hard to achieve, so they need to go to the salon to get it done.
The main feature of this style is its fluffiness and how voluminous it is. It gives that classy and rich vibes, and it is a welcome change compared to all those flat hairstyles we have been used to. One important thing to note about 90’s blowout hair is high maintenance.
However, it is not that hard to achieve, and it is a style you can make from the comfort of your home. But truth be told, you need a lot of patience to create this style, and there will be a lot of trial and error.
Not to worry, the professionals tried it more than once before getting the hang of it.
This article will show you how to create this style in three simple steps. But, before we get started, what are the tools you need to make this style;
- A comb
- Mousse
- Hairspray
- Heat Protectant
- Round Brush
- Hair Dryer (with nozzle)
- Hair Clips
- Hair Roller (Optional)
3 Steps: How to Do a 90’s Blowout Hair
Related: How Long Does A Hair Dryer Last?
Step 1: Start With Clean Hair
Having clean and healthy hair is essential for any style. A damaged or dirty mane will not give the best result when you do a 90’s blowout lock. Therefore, you should ensure your hair is healthy and clean.
Because you need all the volume you could get for a 90’s blowout hair, use a volumizing shampoo and conditioner for your hair. However, ensure you use a moisturizing conditioner to lock in moisture in your mane.
Step 2: Prep the hair
The next step is to prep the hair. After you wash your lock, towel-dry it to get rid of excess water. Then you should run a wide-tooth comb through your hair to remove any knots or tangles in your mane.
If you do not have a wide-tooth comb, you can use your fingers to detangle. Make sure you do this till you do not feel any knot in your hair.
Then you should apply heat protectants to your hair. Using thermal protectants anytime you want to use hot tools is very important to the health of your mane. If you have fine hair, you can use products to protect your hair from heat damage.
But if you have a curly mane, you should go for products that will protect your hair from thermal damage and straighten your hair simultaneously.
The next product you will use is a volumizing spray or mousse. This helps to add texture and volume to the hair. After using all these products on your mane, you should use a blowdryer to rough-dry it till it is about 70-80% dry.
You should not start the blowout on dripping hair because it will take a lot of time. And your hair will be exposed to too much heat, making it susceptible to thermal damage.
The next step to take is to part your hair in sections. The number of sections you have depends on how thick your mane is and your preference.
But most people part it into three divisions, one at the back, one to the left, and the other to the head’s right. Hold each section with a clip or hair tie so they will not interfere with each other while working on them.
Related: How to Clean Dyson Hair Dryer Filter? [6 Easy Steps]
Step 3: Blow-dry and Style
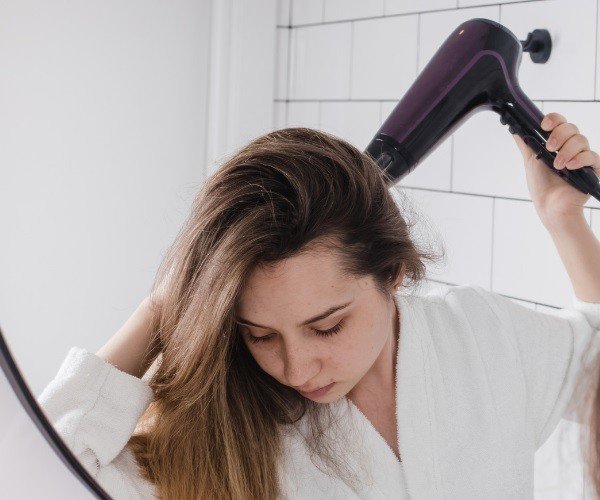
You can start the blowdrying from any of these sections. But in this article, we will be starting with the back section. So start with a bunch of your back hair division. Hold your round brush with one hand and the blowdryer with the other hand.
Make sure that you attach the nozzle to your dryer. Pull your mane up with the round brush and angle your hair roots towards your face. It will feel as if the brush is pulling your hair when you do this. Not to worry, that tension is needed to give more volume to your mane.
As you roll and pull your hair with the brush, remember to blast it with heat from your dryer. Hold the brush and dryer longer at the root of your mane to improve the volume.
Pro tip: use the hairbrush to pull your hair up to maintain its volume. If you pull it down, it will smoothen it and make it flat.
You can use a hairdryer brush to make it easier for you. With a hairdryer brush, you only use one hand instead of two hands in the case of a round brush and hand dryer.
Secure the bunch you have rolled with a clip and continue with other sections while securing it until you are done. Then, roughly pass over the rolled hair with a cool blast from the dryer.
Leave it for a few minutes to cool down, then spray with hairspray to lock in the style. After that, you can remove the clips and run your hands through them to loosen the curls, and then you are done.
However, if you want to use Velcro rollers, you need to complete rolling your hair with the rollers. Then you can pass heat for 10-15 minutes with your hairdryer.
The heat will make the curls last longer; spray with finishing spray to lock the style, then remove the rollers. And run your fingers through to loosen the curls.
Related: What Is The Difference Between Blow Dryer And Hair Dryer?
Final Thoughts
As you can see, it is quite easy to create this classic 90’s blowout hair; you only need to be patient. It’s so fluffy and is a nice change for those used to sleek hair.
However, don’t beat yourself up if you don’t get the hang of it the first time; it might take a while. But once you can create a perfect 90’s blowout hair, you’ll have people asking you where you got your hair done.